In this article
-
Response types and what they are used for
-
Response sets and what they are used for
-
Create a response set
Response types and what they are used for
When creating or editing a checklist in Lumiform Desktop, you can use response types to define how a query is to be answered later during an inspection in the field. For each query you can select a response type.
To select a response type, open any checklist or create a new checklist in Lumiform Desktop. Then, clicking into the line of a checklist and then clicking on the icon at the end of the line will open a menu that shows you all available response types. Select the desired response type by clicking on it.
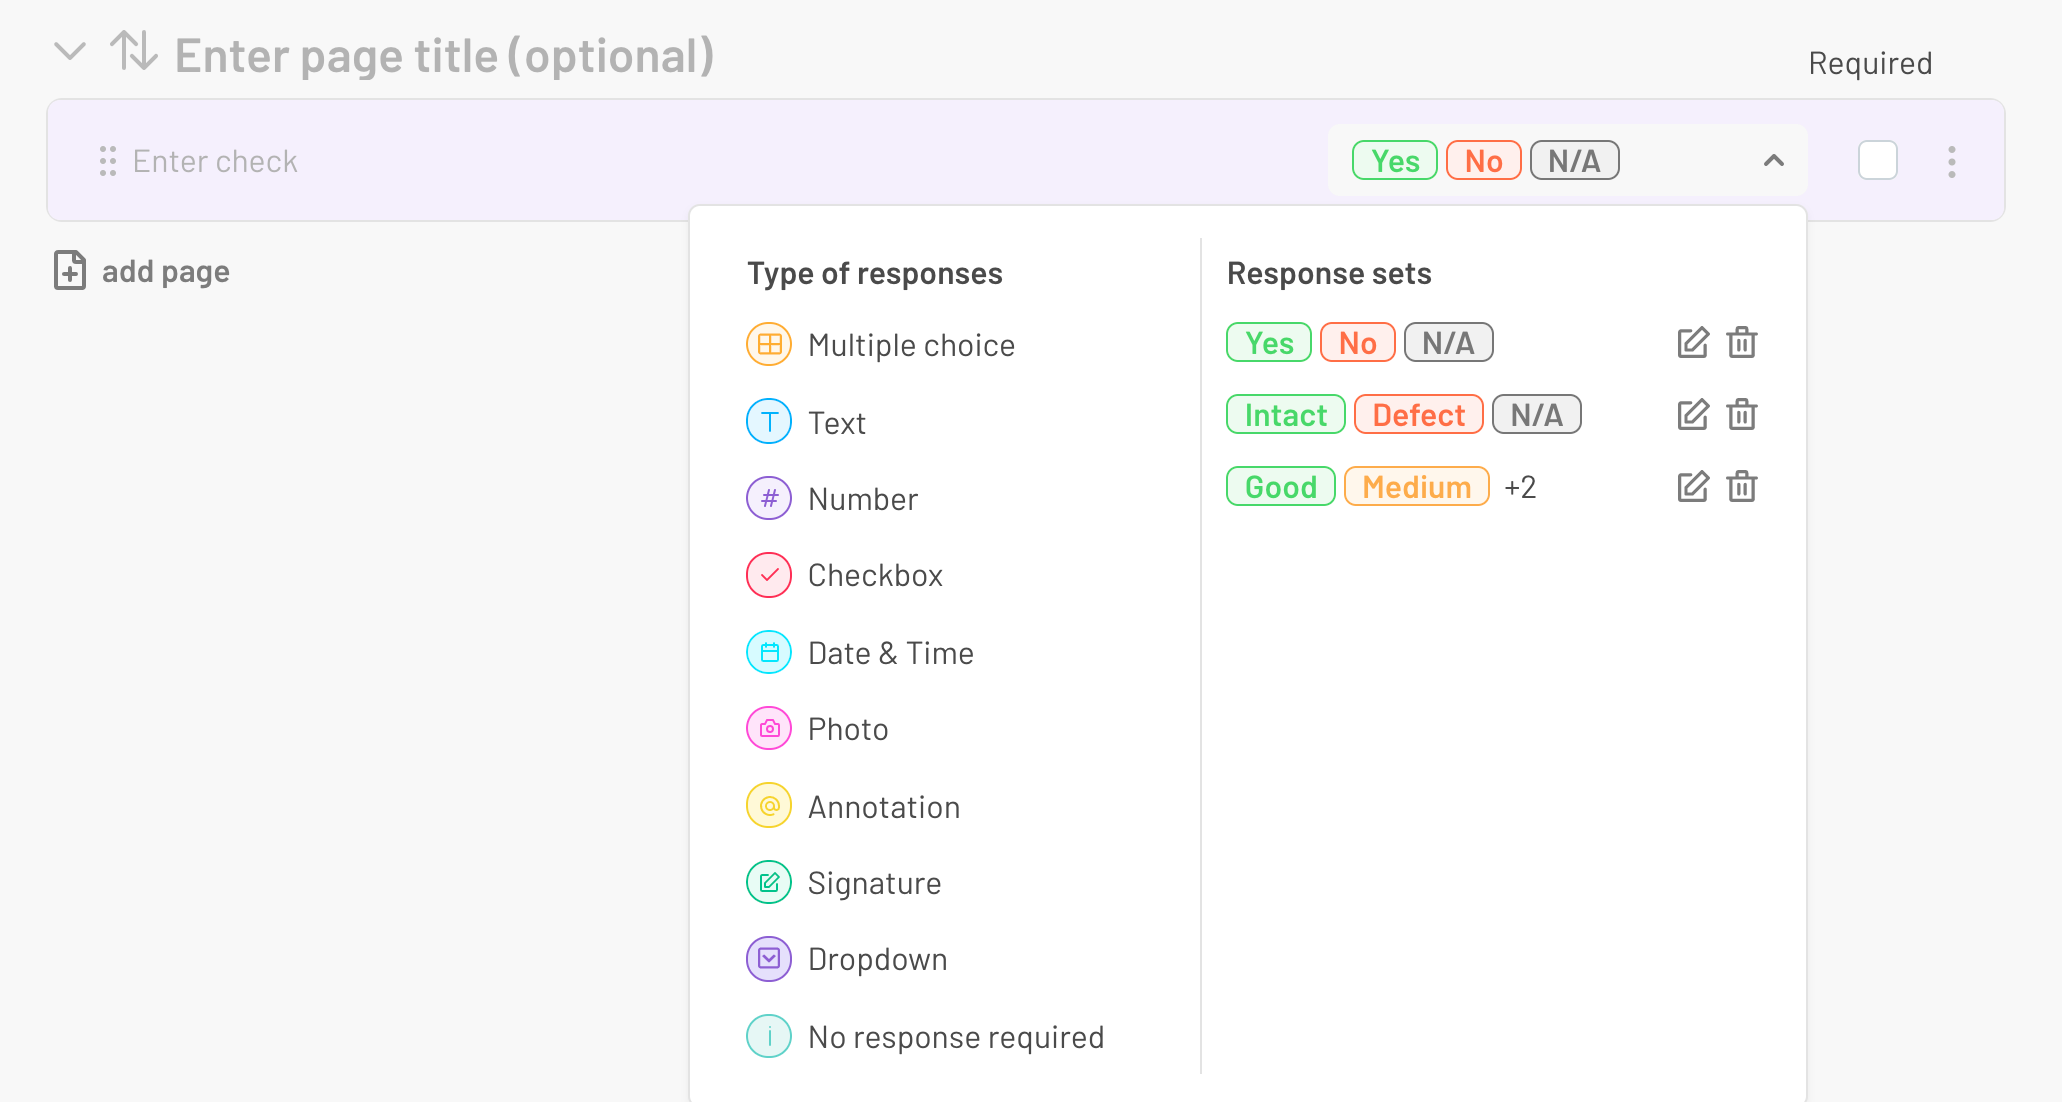
In the following we will briefly discuss the different response types.
Multiple Choice
This type of response allows the user in the field to choose between several response options, such as "Yes, No, N/A" or "Intact, Defect, N/A. For this response type, custom response sets can be created, which are discussed in the section on response sets below.
Text
This type of response allows the user in the field to enter any text.
Number
This type of response allows the user in the field to enter any number. This type of response is particularly suitable for queries on temperatures and quantities.
Checkbox
This type of response allows the user in the field to check a checkbox.
Date & Time
This type of response allows the user in the field to select a time and/or time of day.
Photo
This type of response allows the user in the field to take one or more photos.
Annotation
When creating a form template, this type of response allows an image to be uploaded. The user in the field can then draw on this image, e.g. to circle certain areas.
Signature
This type of response allows the user in the field to sign on the smartphone or tablet.
Dropdown
This type of response allows the user in the field to choose between several response options from a drop-down menu, such as "Supplier 1, Supplier 2, Supplier 3". Individual response sets can be created for this response type, which we discuss in the section on response sets below.
No response required
This type of response is particularly suitable for instructions to the user. When creating a checklist, in addition to the text entered in the check, an image can be uploaded for further explanation. An image is particularly suitable for making instructions even clearer and easier to understand by using images.
QR/Bar Code
With this answer option you can scan a QR- or Bar Code and add e.g. the serial number of a product easily to your form.
!!! With this answer option, no stored documents etc. are transferred.
Response sets and what they are used for
For the response types multiple choice and dropdown, several response options can be grouped into response sets.
By default the response sets "Yes, No, N/A", "Intact, Defect, N/A" and "Good, Medium, Bad, N/A" are created in the form template Builder. In addition to the already created response sets, you can create your own response sets with any number of response options.
Create a response set
To create a response set, click on the corresponding check and select the multiple choice or dropdown answer type by clicking on it.
Response set for multiple choice
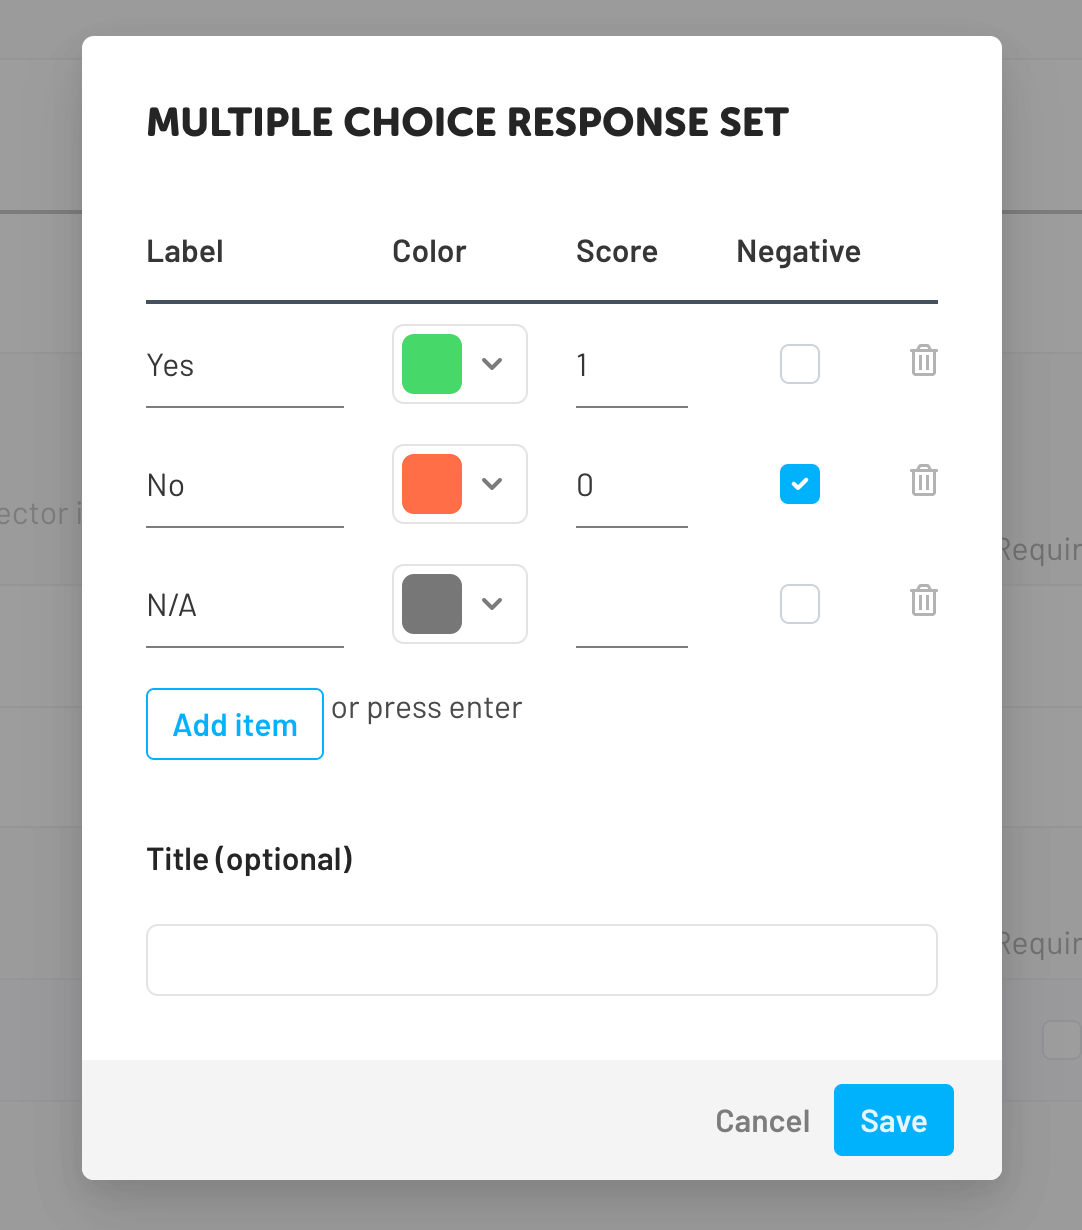
Clicking on multiple choice opens a pop-up. Here you can enter as many individual response options as you like. To add another response option, either click on "Add item" or simply press enter.
You can assign different colours to your response options. To do so, simply click on the box in the column "colour" next to the respective response option and select the desired colour by clicking on it.
Finally, give your response set a unique title, such as "product condition" and click on "save".
The response set can now be found among the already created response sets with its title and can be selected as response type for any number of questions by clicking on it.
Scores and negative answers help you to analyse your forms.
Response set for dropdown
Clicking on dropdown opens a pop-up. In the top line you can assign an individual title, e.g. "Supplier list". Then you can enter as many individual response options as you like in the other lines. To add another response option, either click on "Add item" or simply press Enter. When you have entered all desired response options, click on "Save".
The response set can now be found among the already created response sets with its title and can be selected as response type for any number of questions by clicking on it.