
This article shows you a global demonstration of how to use Lumiform for maximum efficiency.
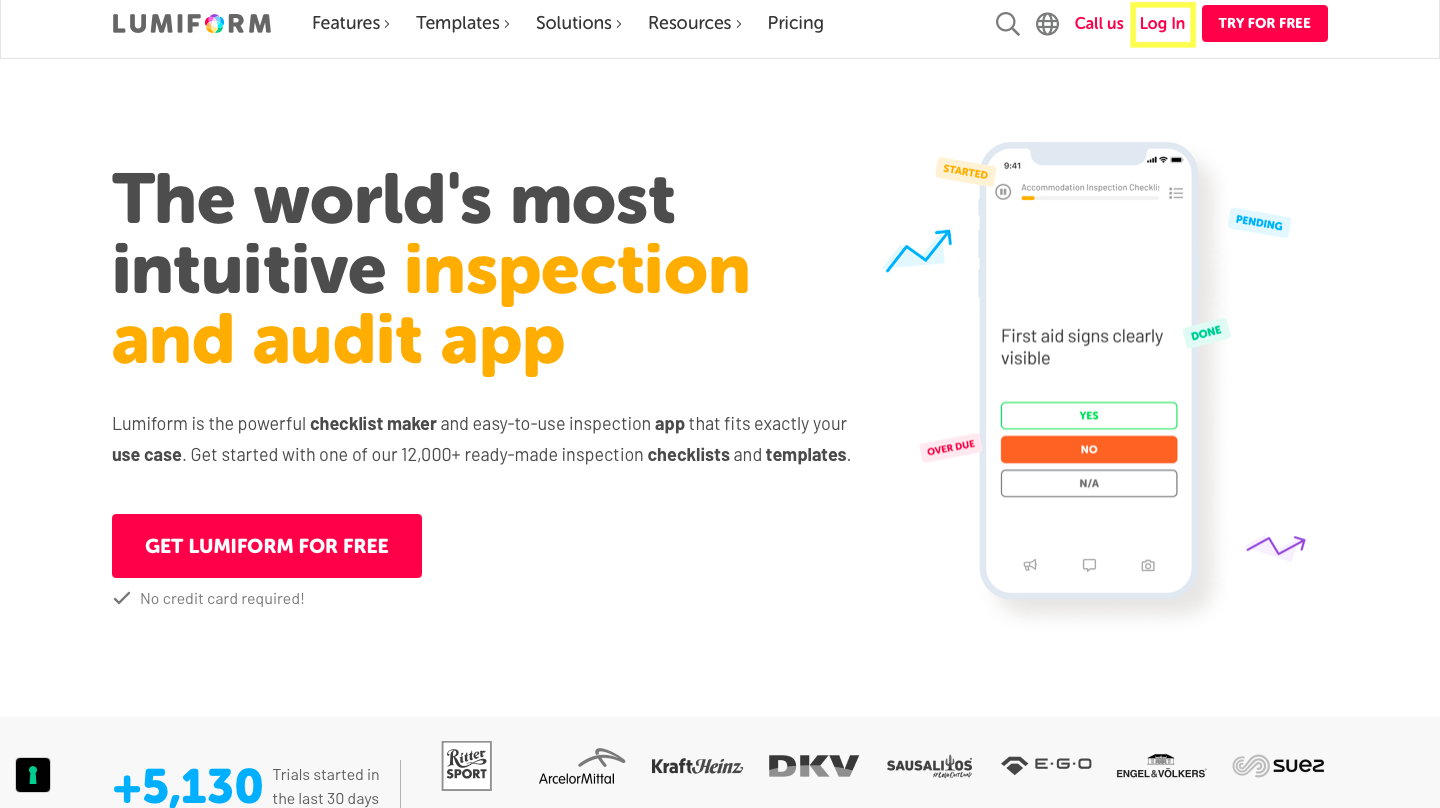
Welcome to Lumiform! The world's most intuitive inspection and audit app.
We are the most intuitive inspection and audit system. Therefore, getting started has never been easier.
First of all, go to the Lumiform website and click Login.
If you already have an account, add your email address and password. If not, you can click I'm new here-Sign up and get started with us!
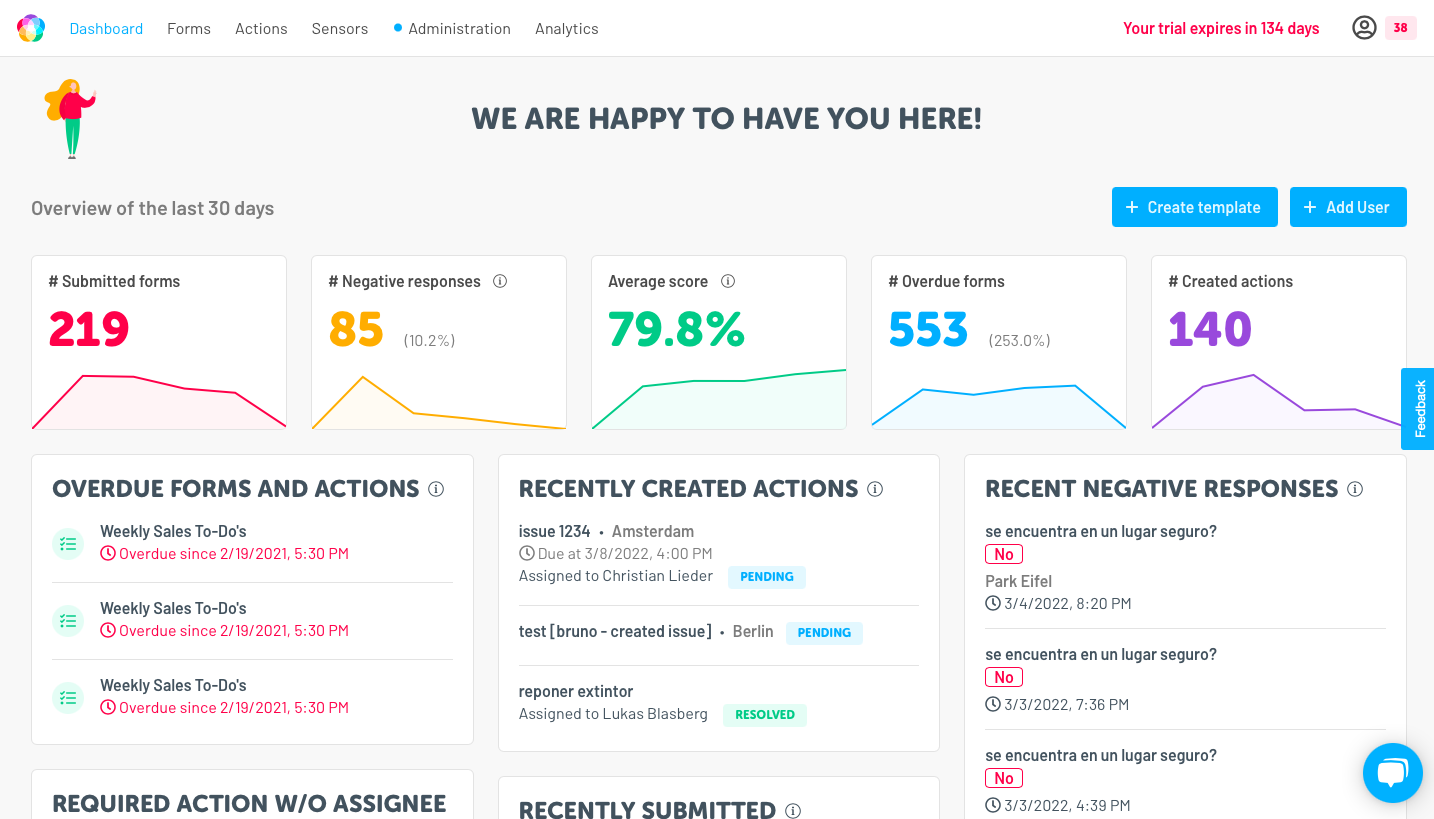
After logging in, you will see the Dashboard or control panel.
Before going deeper, you will need to create a new user. The admin is the person who can add permissions. When you log in for the first time, you are the admin, so you can create as many users and groups as you need and add the permissions you think they will need.
If you are not sure what kind of permission they would need, here you can learn more about user roles and permissions. With this article, you can also learn how to assign them to your users and groups.
Build your template:
Once you discover all the functionalities, Lumiform provides you. You can start creating new templates or use one of our +10,000 forms that Lumiform has already created.
To do so, you need to select Forms from the top menu and click + Create a template. Here, you can decide if you want to use one of our templates or create a new one from scratch.
If you decide to create a new one from scratch, you will see a page where:
- Enter title template: It is the main title of the template. You can see how it looks on your mobile device by glancing at the right side of the screen.
- Header page: The header is the first page of your report. The user is asked to select a site if multiple sites exist and if no schedule is set.
- Enter page title: You can create as many pages as you need. Therefore, to distinguish the different areas or topics, you can add a title per page.
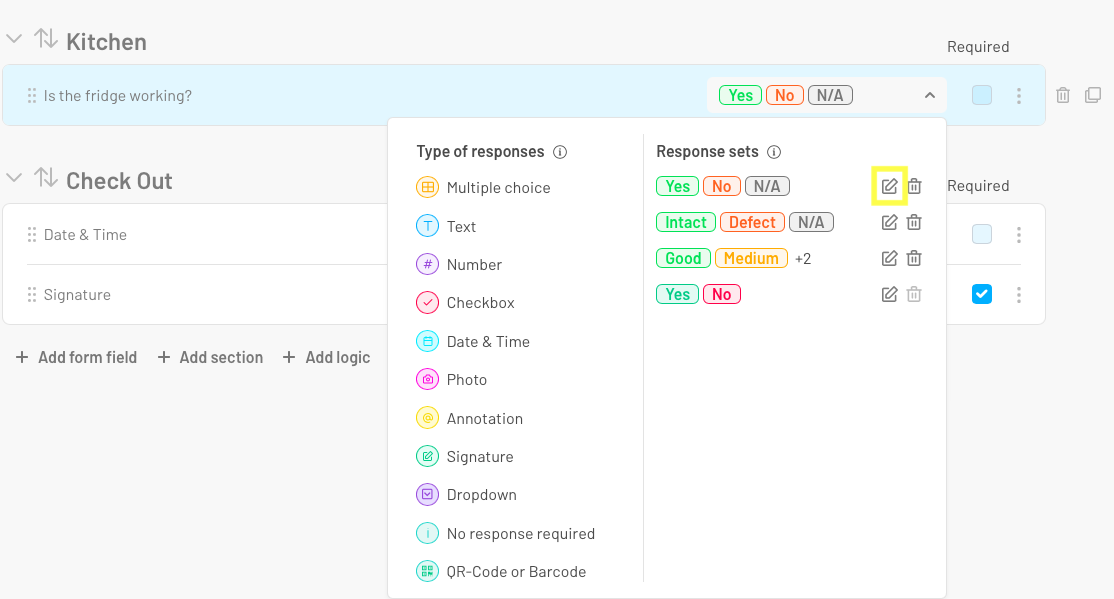
- Enter check: This is the space where you can write the question that should be answered or what is to be checked.
Lumiform brings you many types of responses. You need to select the option that best suits your needs. The answer sets can be easily modified. Select the pencil and add more choices or change the previous ones.
If you hold the arrow on the first question, you can add the following options:

- Check: It enables you to create as many questions as you need. You can modify it, change the type of response or create a new section.
- Section: It is a group of questions bunched together. They are a great way to organize questions within your templates to help you and your team progress through forms easier and improve the reading experience for report stakeholders.
- Logic: It enables you to trigger follow-up questions depending on a user's answer. To smarten your template, get users to see questions relevant to their specific task at hand to minimize any unanswered questions.
Use it as many times as you need and customize the template as you want. You can check the final result at the right of the screen with the mobile's viewer.
On the top of the template, you can see three options:
- Build top menu were to create the template.
- Assign: This page brings you the opportunity to manage who should be entitled to fill the forms.
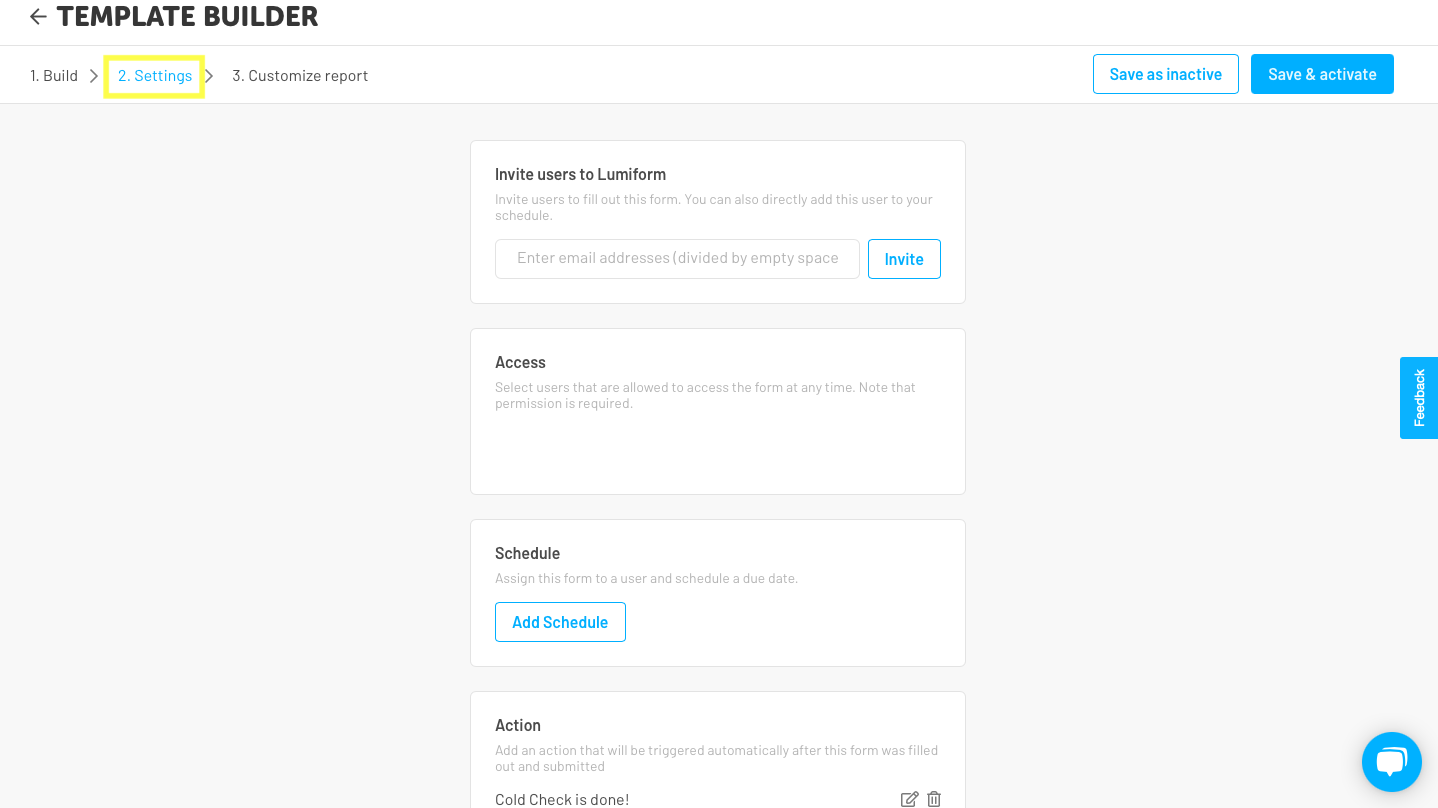
As you can see, you can add Lumiform's users or send it to external accounts by email. In addition, you can schedule by when the form should be completed and schedule whether it should be repeated overtime or not. - Customize report: You can hide and show the essential information to you in your reports. You have many options on the left side of the screen. If you select the pencil, you will see the full options menu to customize the template as needed. You can add a logo, hide or show the sections you deem necessary and, as you can see below, display percentage ranges for your result.
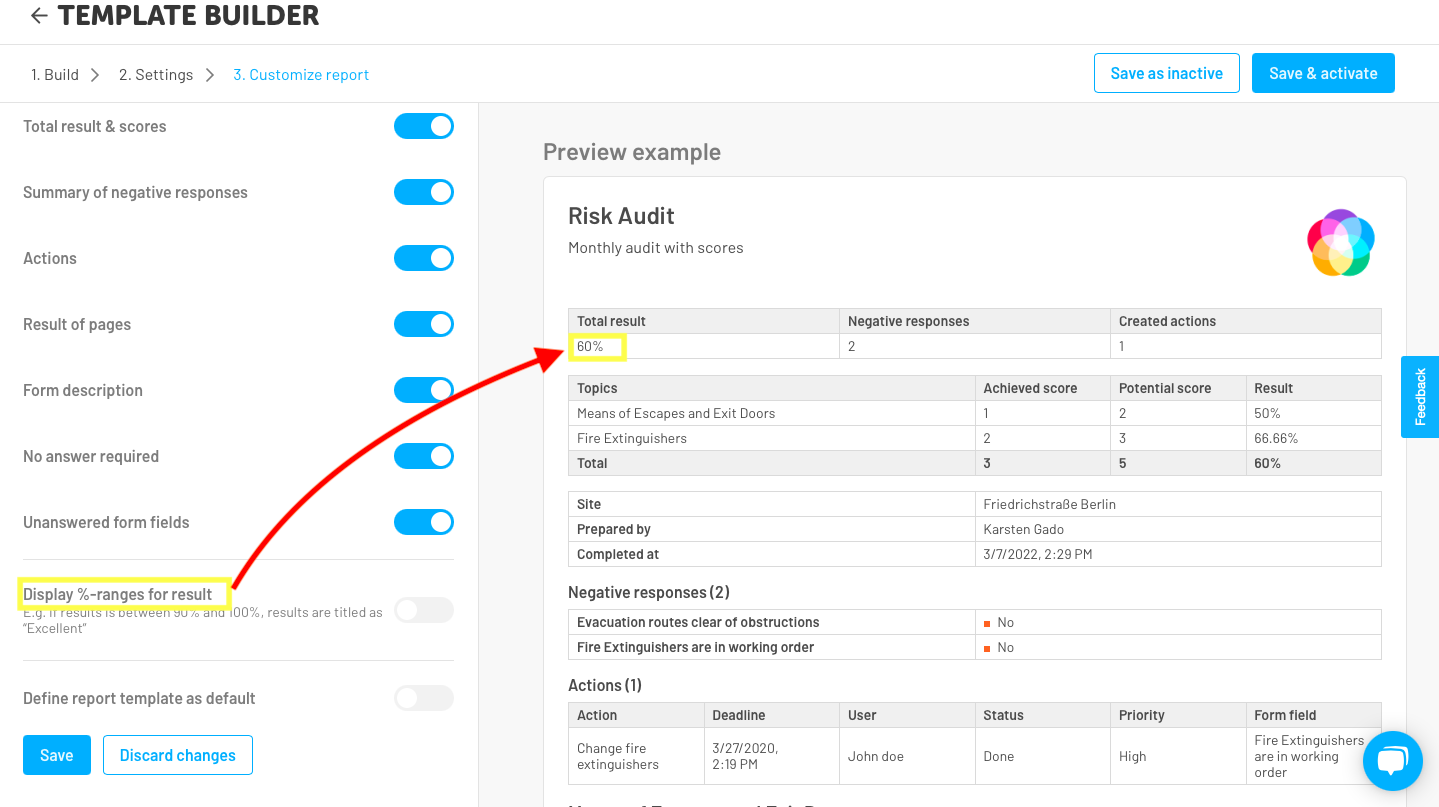
To save the template, you can Save it as inactive or Save & active. If you need to continue editing the template before using it, keep it inactive and continue editing. On the other hand, if you get the template you need, you can save it, activate it, and start using it whenever you need it.
Start Forms from templates:
Once you have created the template you need, you can start using it. Click Forms from the top menu. This will show you all the forms performed and relevant information such as the person who conducted the audit, the location, the time frame, and the percentage of each report's overall results.
In addition, in this menu, you will be able to view Scheduled forms and Negative responses.

If you want to start an inspection, click the Start Form template and select the template you want to use. Moreover, you can use filters to get to the form you might be looking for quickly and easily.
Important note: Don't forget to click on "Submit" in the upper right corner after you have given some answers so that you can see the automatically generated report.
Create action:
Empower your team to report actions as soon as they occur. As soon as the action is assigned to team members, they will be notified immediately. Easily track the status of all actions and make sure they get solved quickly and reliably.
To create a new action, click + Create action and complete the information based on the problem which needs to solve.
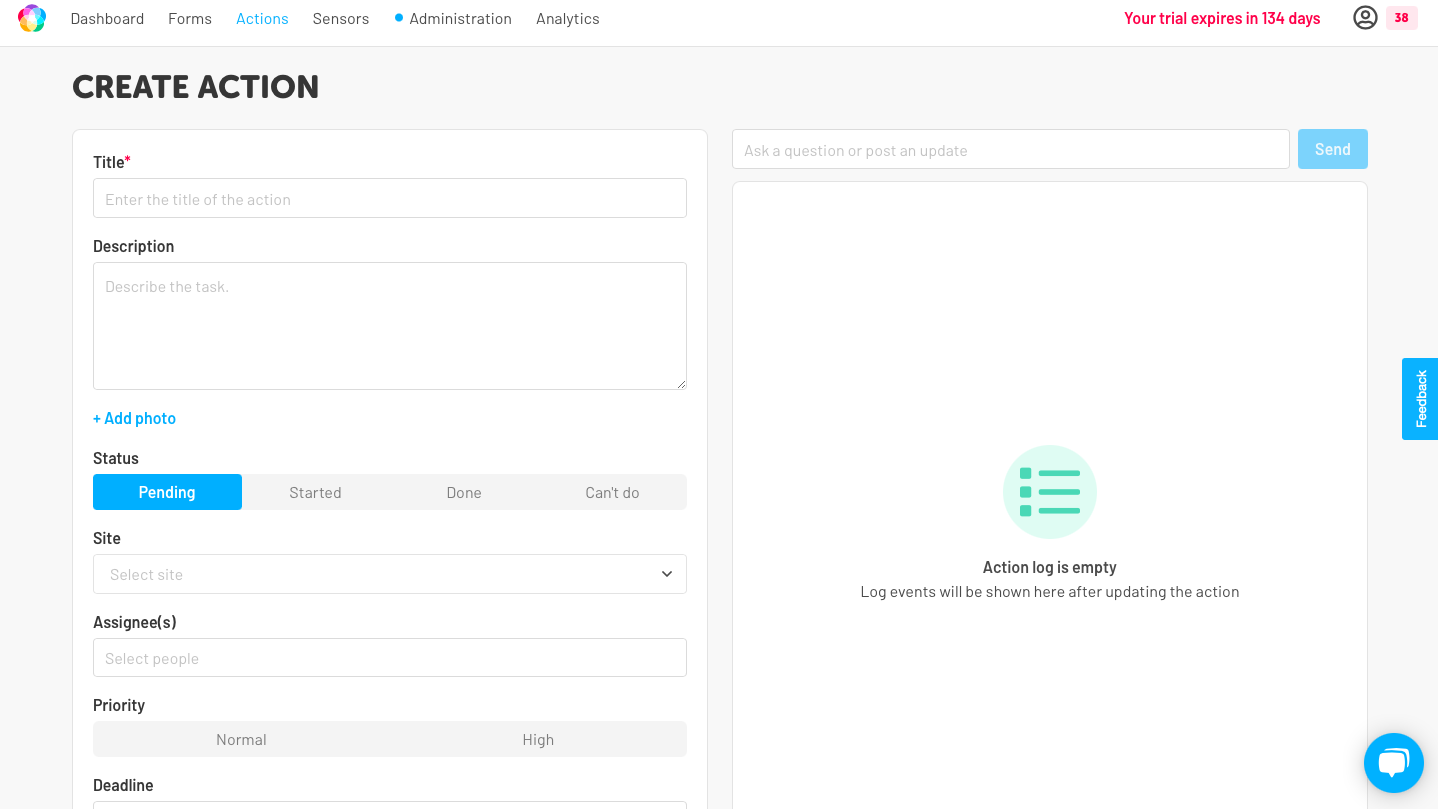 Each action has its audit trail, which logs comments, media attachments, and field updates in real-time. This means all parties involved in the action can collaborate in one space to resolve the problem. Once settled, all the details and activities can be generated in a web report to be shared with relevant stakeholders.
Sensors:
The Sensors feature gives you real-time insight into your assets' environmental conditions. We offer Temperature and humidity sensors to support different use cases.
Note that one gateway can support multiple sensors, but we recommend not connecting more than 30 sensors to a single getaway to ensure reliable data transmission.
To find more about our hardware sensors solutions, you can contact us.
Administration:
In this section, depending on the permissions you have, you will be able to:
- Users: Create, edit or delete new/current users.
- Groups: As your organization scales, managing permissions and document access on an individual user level can become taxing. To address this problem, you can create groups to organize your users into teams, such as a "Managers" group and a "Users" group.
- Sites: Create sites, so your inspections always indicate where they were conducted. Users are always asked to select a site at the beginning of the form. Using sites helps you to gain better insights into the performance of your organization based on the locations.
- Roles: Roles allow you to control features and ensure that every user can view and report the information they are entitled to. It helps you manage inadvertently, and unwanted changes, such as changing results after the form is submitted.
- Categories: Categories allow you to group your questions and form templates to a similar topic and analyze them in bundles.
- API Keys: Here, you can manage your API Key and secret needed to access the Lumiform API.
Analytics:
Analytics is a powerful tool that can help you monitor and analyze data over time in your organization.
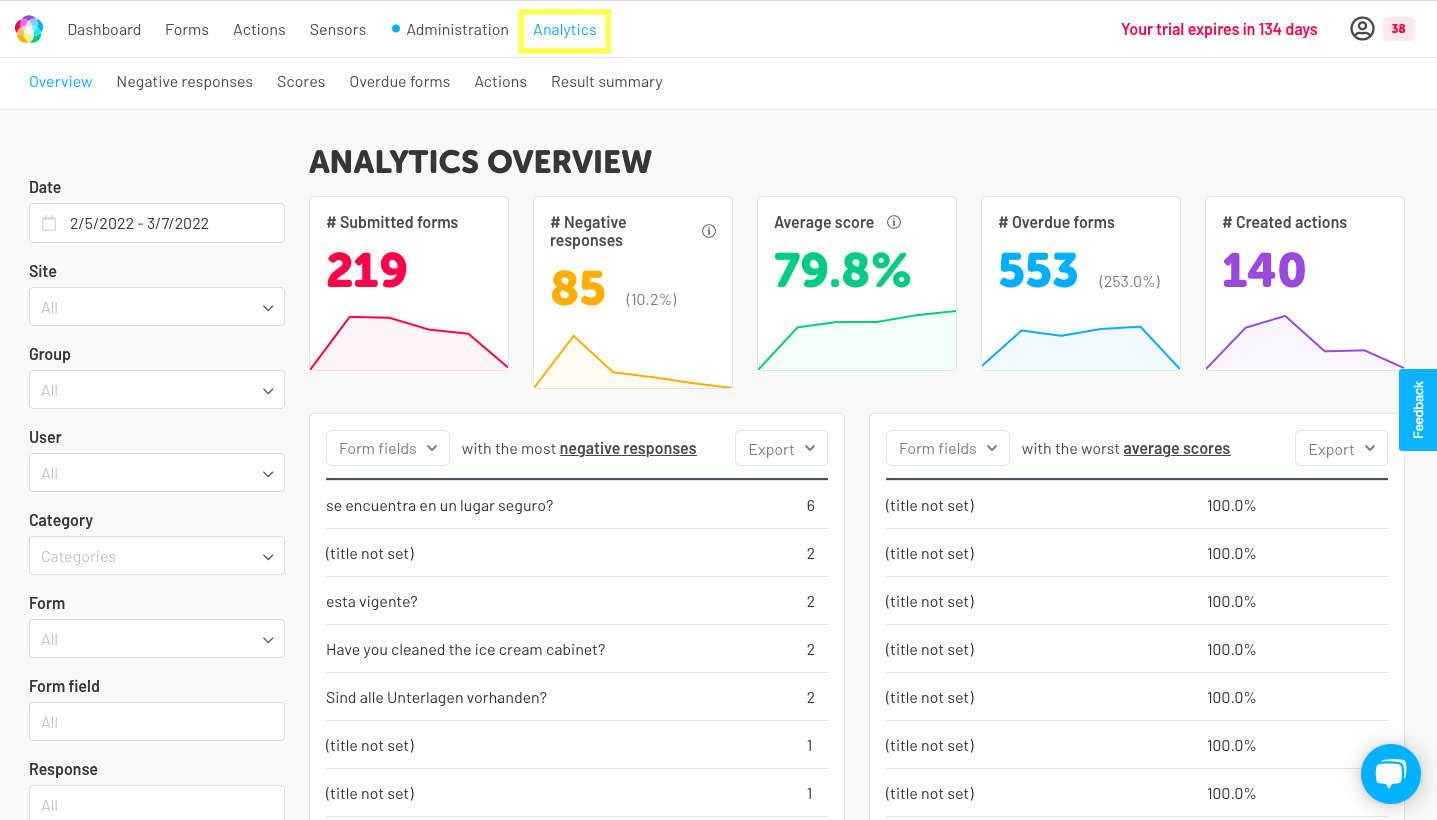 Analytics is packed with actionable data that can help your organization achieve and maintain success in compliance, safety, and more.
You can customize the data by using the filter provided by Lumiform on the left side of the screen. In addition, you can get a more in-depth analysis by selecting one of the options in the top bar and filtering according to your needs.

You can click on the following link if you need more information on how to get started with Analytics.
We hope you find this article helpful. If you have any additional questions, please contact us.